Q.
네이버 _new로 이미지 이동
네이버 _blank로 이동
구글로 이동
nate 이미지 이동
빨강색 선 w : 700 왼쪽 굵기 5
핑크색 선 w : 700 오른쪽 굵기 10
0914 _6번 예제로 이동
0914_마지막 과제로 이동
dog 이미지 w:300으로 가져오기
<!DOCTYPE html>
<html>
<head>
<meta charset="utf-8">
<title>Insert title here</title>

<style type="text/css">

	a:link{
		color: black;
		text-decoration: none;
	}

	/* 한번이라도 클릭했을때 스타일시트 */
	a:visited {
		color: gray;
		text-decoration: none;
	}

	/* 마우스 오버시 스타일시트 */
	a:hover {
		color: red;
		text-decoration: underline;
	}

</style>


</head>
<body>

<a href="https://www.naver.com" target="_new"><img alt="네이버" src="../image/naver.gif"></a><br>
<a href="https://www.naver.com" target="_blank" style=color:blue>네이버 _blank로 이동</a><br>
<a href="https://www.google.com">구글로 이동</a><br>
<a href="https://www.nate.com"><img alt="네이트" src="../image/nate.gif"></a><br>


빨강색 선 w : 700 왼쪽 굵기 5
<hr color=red width=700px size=5 align=left><br>
핑크색 선 w : 700 오른쪽 굵기 10
<hr color=pink width=700px size=10 align=right><br>


<a href="../day0914/ex6_cssClass.html">0914 _6번 예제로 이동</a><br>
<a href="../day0914/quiz_cssTable.html">0914_마지막 과제로 이동</a><br>

dog 이미지 w:300으로 가져오기<br>
<img alt="dog" src="../image/dog1.jpg" width=300px>
</body>
</html>
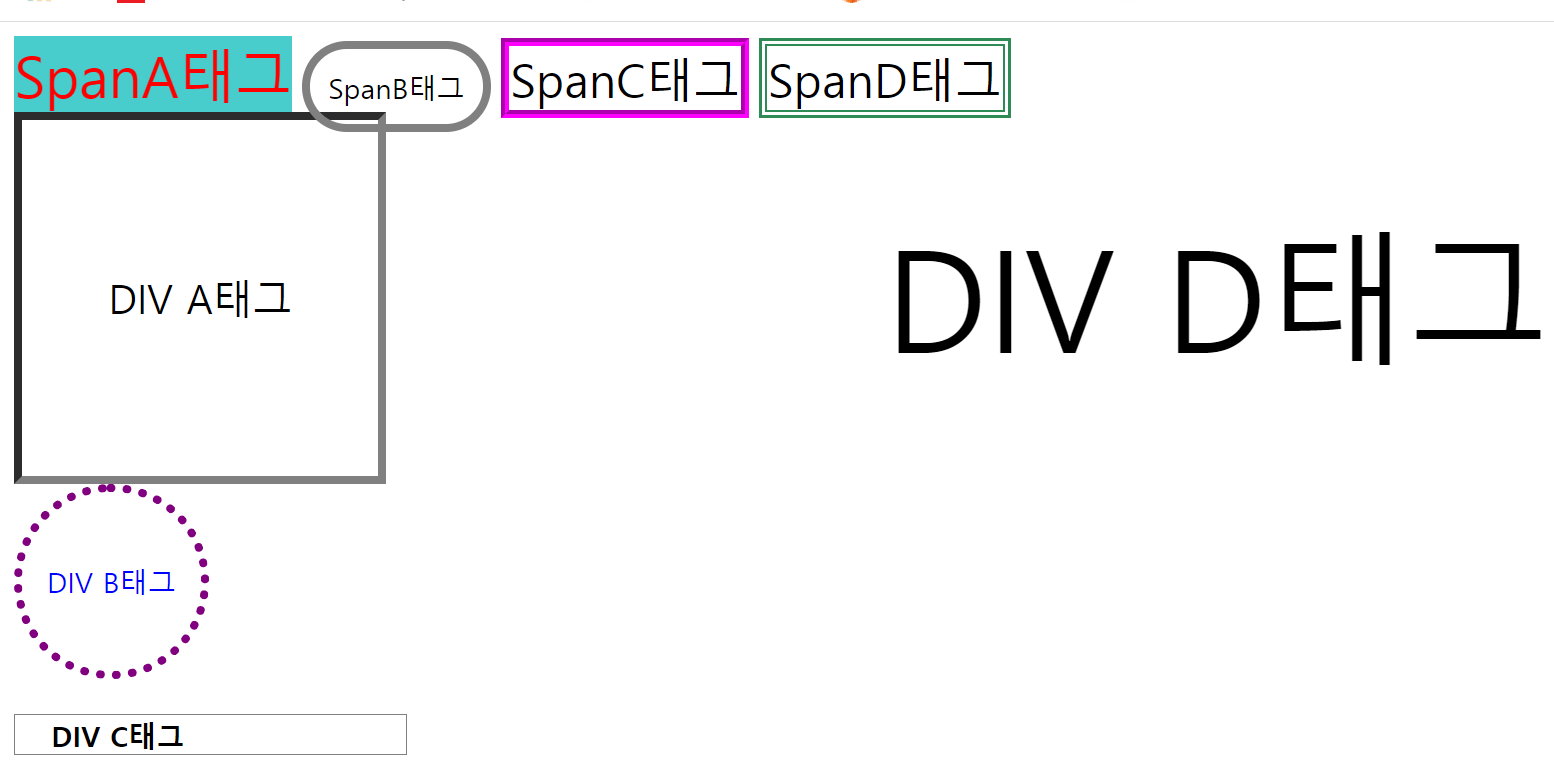
☆ DIV & Span
<!DOCTYPE html>
<html>
<head>
<meta charset="EUC-KR">
<title>Insert title here</title>

<style type="text/css">

	/* sapn 태그에만 적용 가능한 a클래스 */
	span.a {
		color: red;
		font-size: 2em;
		background-color: #48cccc;
	}

	span.b {
		border: 5px solid gray;
		border-radius: 50px; /* 테두리 둥글게 */
		padding: 10px /* 안쪽 여백 */
	}

	span.c {
		border: 5px groove magenta; /* 선종류: solid, dotted, groove, dashed */
		font-size: 20pt
	}

	span.d {
		width: 200px;
		font-size: 20pt;
		border: 5px double #23df;
	}

	div.a {
		width: 200px;
		height: 200px;
		line-height: 200px;
		font-size: 1.4em;
		text-align: center;
		border: 5px inset gray;
	}

	div.b{
		width: 100px;
		height: 100px;
		line-height: 100px;
		text-align: center;
		border: 5px dotted purple;
		color: blue;
		border-radius: 100px;
	}

	div.c{
		border: 1px solid gray;
		padding-left: 20px; /* 안쪽 왼쪽 여백 */
		margin-top: 20px; /* 바깥쪽 위쪽 여백 */
		width: 200px;
		font-weight: bold;
	}

	div.d{
		position: absolute; /* 절대좌표 지정 */
		left: 500px; /* 왼쪽으로부터 */
		top: 100px; /* 위쪽으로부터 */
		font-size: 5em;
	}

</style>

</head>
<body>

	<span class="a">SapnA태그</span>
	<span class="b">SapnB태그</span>
	<span class="c">SapnC태그</span>
	<span class="d">SapnD태그</span>

	<div class="a">DIV A태그</div>
	<div class="b">DIV B태그</div>
	<div class="c">DIV C태그</div>
	<div class="d">DIV D태그</div>

</body>
</html>
◎ 참고용
div vs span vs p 차이는 블록 요소와 포함 유무 - dAsImA
div vs span vs p 태그 차이점은 무엇일까요? 블록 요소와 인라인 요소의 차이점이 있습니다. 여기서 파생되어 서로 포함할 수 있는 경우의 수가 정해져 있습니다. 같은 블록 요소인 div, p 태그의 경
dasima.xyz
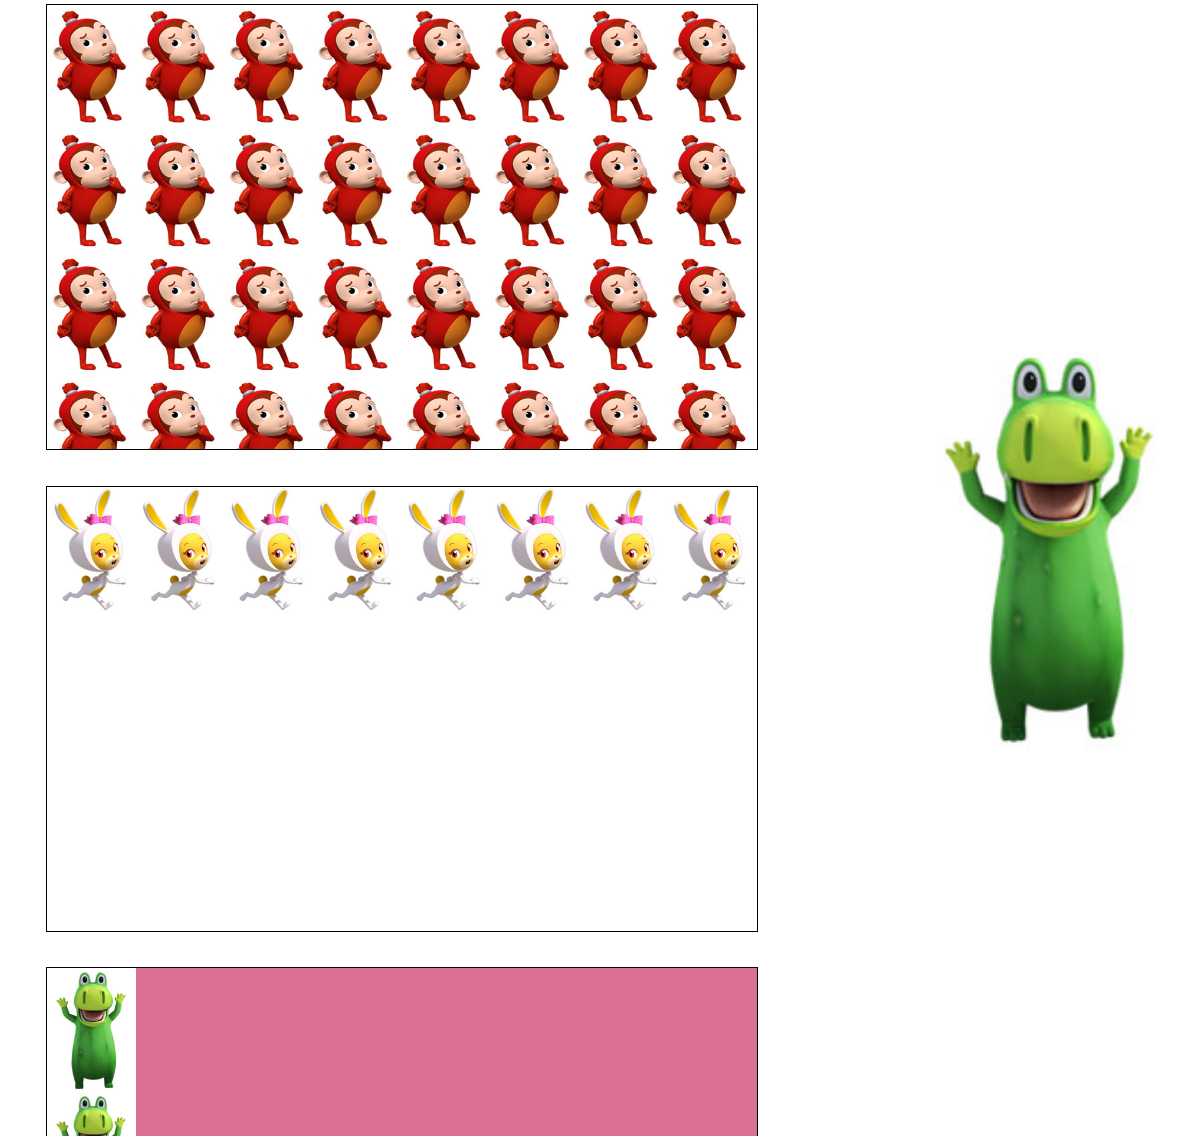
☆ Div - Image
<!DOCTYPE html>
<html>
<head>
<meta charset="utf-8">
<title>Insert title here</title>

<style type="text/css">

	div {
		width: 400px;
		height: 250px;
		border: 1px solid black;
		margin-bottom: 20px;
		margin-left: 300px;
		background-size: 50px 70px;
	}

	div.a{
		background-image: url("../image/image_01.png");
	}

	div.b{
		background-image: url("../image/image_02.png");
		background-repeat: repeat-x;
	}

	div.c{
		background-image: url("../image/image_03.png");
		background-repeat: repeat-y;
	}

	div.d{
		background-image: url("../image/image_04.png");
		background-size: 100px 100px;
		background-repeat: no-repeat;
		background-position: right bottom; /* 위치지정 */
	}

	body{
		background-image: url("https://www.howtogeek.com/wp-content/uploads/2018/06/shutterstock_1006988770.png");
		background-repeat: no-repeat;
		background-position: 800px 200px;
	}

	/* 범용클래스.. 모든 태그에서 사용가능 */
	.bg{
		background-color: #db7093;
	}

</style>

</head>
<body>

	<div class="a"></div>
	<div class="b"></div>
	<div class="c bg"></div>
	<div class="d"></div>

</body>
</html>
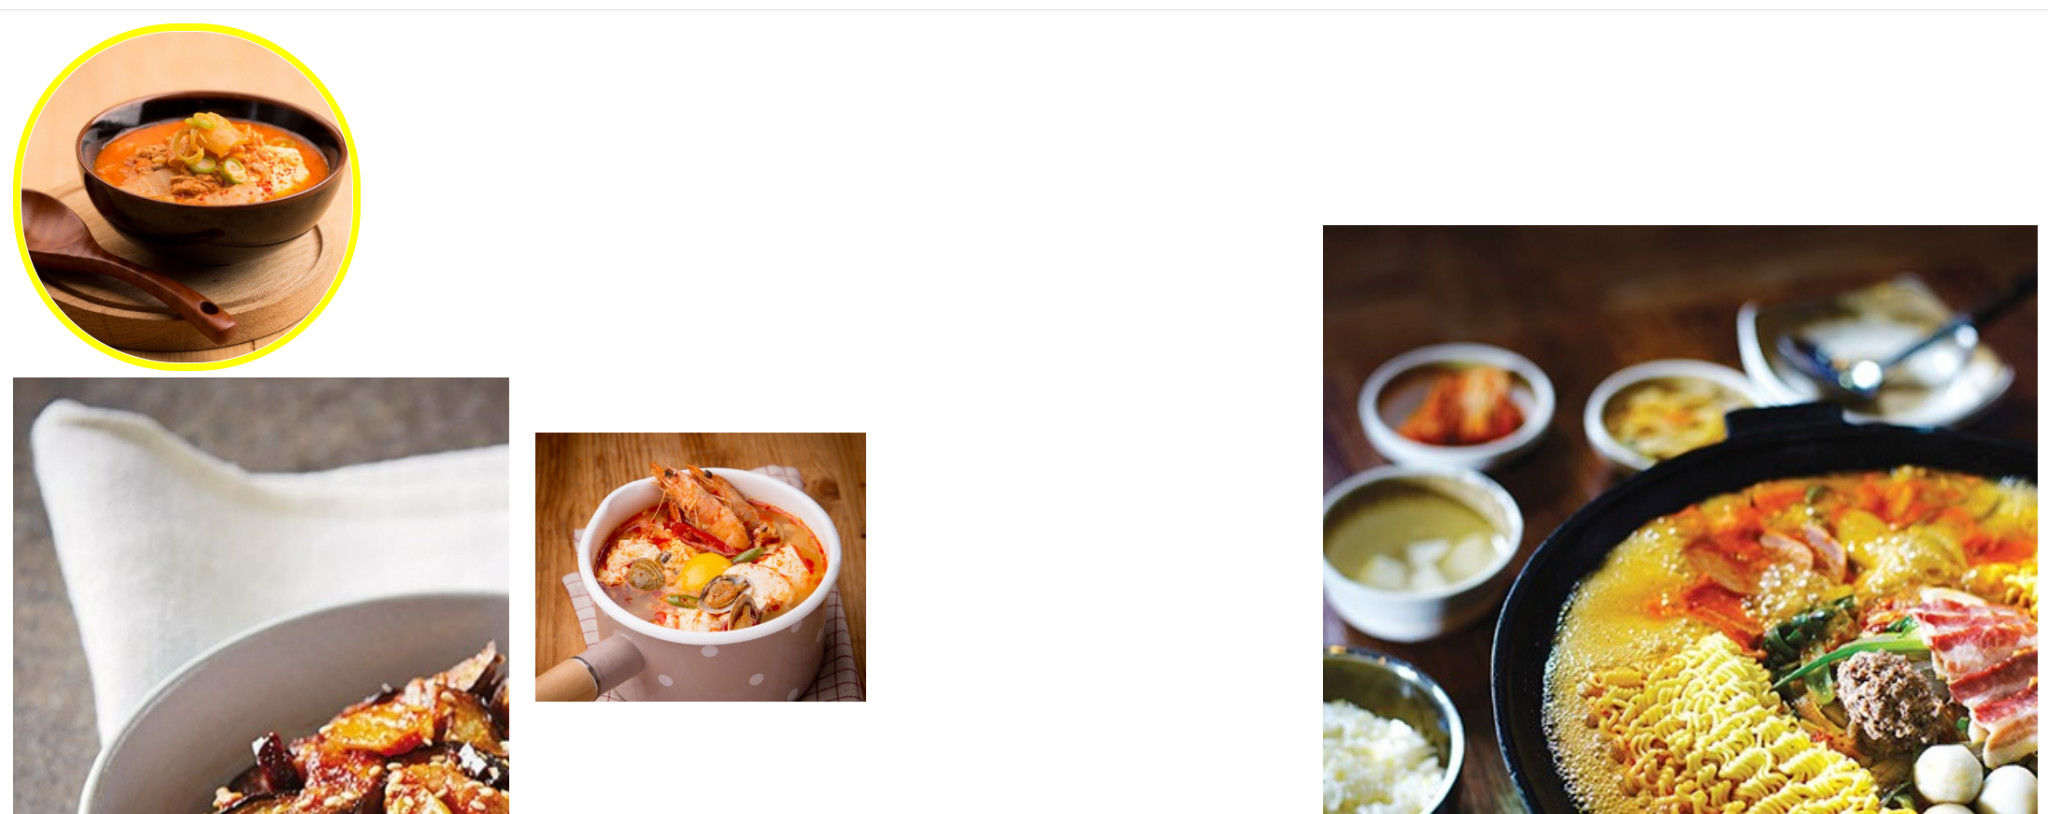
☆ ID - 이벤트 처리할 경우
<!DOCTYPE html>
<html>
<head>
<meta charset="utf-8">
<title>Insert title here</title>

<style type="text/css">

	/* id 가리킬때, #을 사용 */
	#myimg1{
		width: 200px;
		height: 200px;
		border-radius: 100px;
		border: 5px solid yellow;
	}

	#myimg2{
		position: relative;
		left: 100px;
		top: 200px;
		width: 200px;
	}

	#myimg3{
		position: absolute;
		left: 800px;
		top: 130px;
	}

	#myimg4{
		width: 300px;
		height: 300px;
		background-image: url("../image/cook1.jpg");
		background-repeat: no-repeat;
	}

	/* 마우스 클릭시 */
	#myimg4:active {
		background-image: url("../image/cook5.jpg");
	}

	/* 마우스 오버시 이미지 변경 */
/* 	#myimg4:hover {
		background-image: url("../imgae/2.png");
	} */

</style>

</head>
<body>

	<!-- class는 중복 가능 -->
	<!-- ID는 고유값이기에 중복불가 -->
	<img alt="이미지없음1" title="음식1" src="../image/1.png" id="myimg1">
	<img alt="이미지없음2" title="음식2" src="../image/2.png" id="myimg2">
	<img alt="이미지없음3" title="음식3" src="../image/3.png" id="myimg3">
	<div id="myimg4"></div>

</body>
</html>
★ Table 연습
◎ 테이블 1
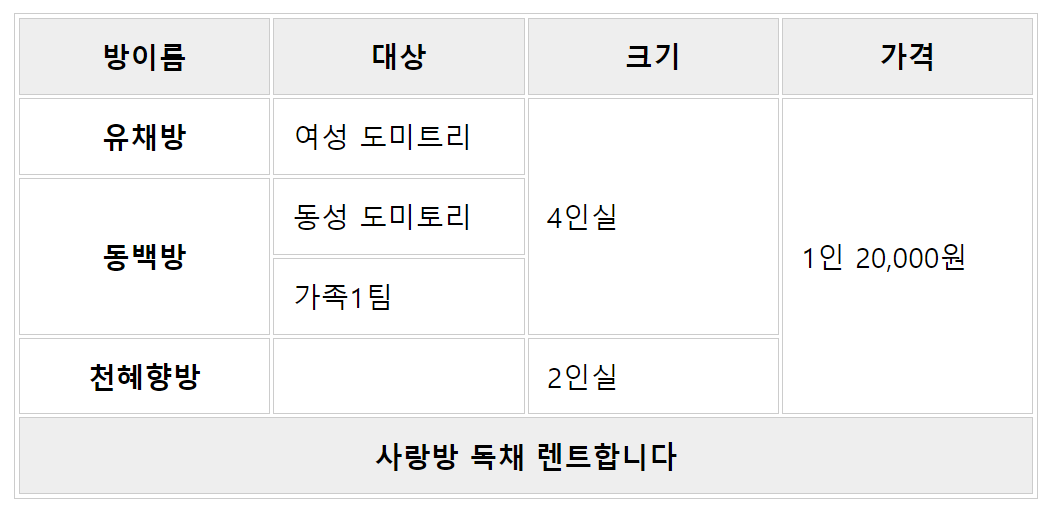
Q.
1번테이블 아래 선하나 그리고 그아래 테이블 2,3 완성
◎ 테이블 2
◎ 테이블 3
<!DOCTYPE html>
<html>
<head>
<meta charset="utf-8">
<title>테이블 연습</title>
<style type="text/css">
table, th, td{
border: 1px solid #ccc;
}
th,td{
width: 120px;
padding: 10px;
}
thead, tfoot{
background: #eeeeee;
}
</style>
</head>
<body>
<table border="1" style="border-collapse: collapse;">
<thead>
<tr>
<th>방이름</th><th>대상</th><th>크기</th><th>가격</th>
</tr>
</thead>
<tbody>
<tr>
<th>유채방</th>
<td>여성 도미트리</td>
<!-- rowspan : 세로로 셀 병합 -->
<td rowspan="3">4인실</td>
<td rowspan="4">1인 20,000원</td>
</tr>
<tr>
<th rowspan="2">동백방</th>
<td>동성 도미토리</td>
</tr>
<tr>
<td>가족 1팀</td>
</tr>
<tr>
<th>천혜향방</th>
<td></td>
<td>2인실</td>
</tr>
</tbody>
<tfoot>
<tr>
<!-- colspan은 가로 셀 병합 -->
<th colspan=4>사랑방 독채 렌트합니다</th>
</tr>
</tfoot>
</table>
<hr color=red size=5>
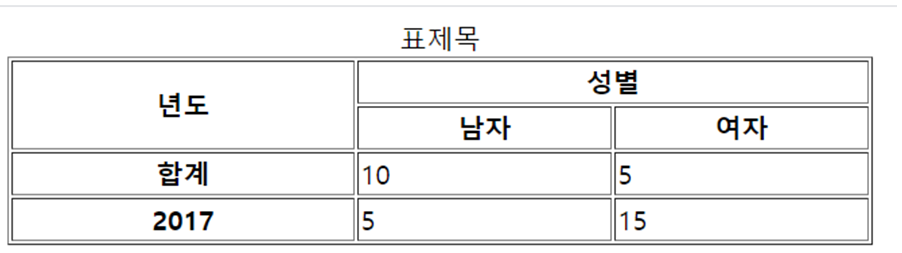
<table id="table2">
<caption>표제목</caption>
<!-- tr이 하나의 행 단위임을 명심 -->
<tr>
<th rowspan=2>년도</th><th colspan=2>성별</th>
</tr>
<tr>
<th>남자</th><th>여자</th>
</tr>
<tr>
<th>합계</th><td align="left">10</td><td align="left">5</td>
</tr>
<tr>
<th>2017</th><td align="left">5</td><td align="left">15</td>
</tr>
</table>
<hr color=red size=5>
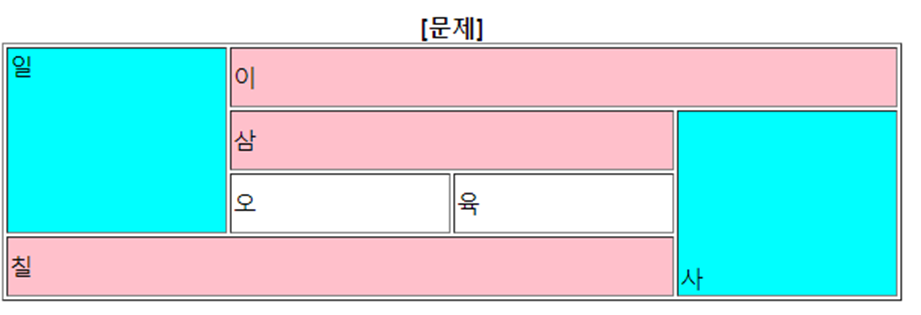
<table>
<caption><b>[문제]</b></caption>
<!-- tr로 반드시 감싸야한다 -->
<tr>
<!-- td는 table data의 약자 -->
<!-- 테이블 배경색은 bgcolor -->
<!-- 위아래 정렬시 valign -->
<td rowspan=3 bgcolor="skyblue" valign="top">일</td><td colspan=3 bgcolor="pink">이</td>
</tr>
<tr>
<td colspan=2 bgcolor="pink">삼</td><td rowspan=3 bgcolor="skyblue" valign="bottom">사</td>
</tr>
<tr>
<td>오</td><td>육</td>
</tr>
<tr>
<td colspan=3 bgcolor="pink">칠</td>
</tr>
</table>
</body>
</html>
Q.

◎ CSS
@charset "utf-8";

	p{
		font: 15px/2em "나눔고딕";
		width: 800px;
	}

	p.box1{
		background-color: #ffe4c4;
		padding : 20px;
	}

	p.box2{
		background-color: #800080;
		padding: 20px;
	}

	li{
		list-style: square;
	}
◎ HTML
<!DOCTYPE html>
<html>
<head>
<meta charset="utf-8">
<title>Insert title here</title>

<link rel="style.css" type="text/css" href="../css/style.css">

</head>
<body>

	<img alt="이미지" src="../image/title_banner.jpg">
	<h1>여행 스케치 챌린지 #3</h1>
	<p>문화가 융성하고 예술이 살아있는 대한민국의 아름다운 여행지를 그려주세요. 당선작은 총 1,000만원의 상금을 드리며, 문화체육관광부에서 진행하는 다양한 활동을 통해 작품을 소개해 드립니다.</p>

	<h2>응모방법</h2>
	<p>응모방법  주제 : 문화, 예술, 휴식이 있는 아름다운 대한민국 여행</p>
	<ul>
		<li>주제와 예시를 참고하여 여행의 기억과 느낌을 떠올려 주세요</li>
		<li>널리 알리고픈 아름다운 우리나라 문화와 여행지를 그림으로 표현해 주세요</li>
		<li>상단의 '챌린지 참여하기'를 클릭하여 그림을 업로드해 주세요</li>
	</ul>

	<h2>일정</h2>
	<ul>
		<li>일정 접수 및 투표기간 : 9월 4일 ~ 10월 4일</li>
		<li>심사기간 : 10월 5일 ~ 10월 7일</li>
		<li>당선발표 : 10월 8일</li>
	</ul>

	<h2>심사기준</h2>
	<ul>
		<li>심사기준 심사위원 점수 70% + 좋아요 점수 30%</li>
	</ul>

</body>
</html>
★ Class와 id
<!DOCTYPE html>
<html>
<head>
<meta charset="utf-8">
<title>Insert title here</title>

<style type="text/css">

	/* 클래스는 동시 여러군데 사용가능(.) 아이디는 #으로 만들며 딱 한군데만 사용가능 */
	.mbc{
		color: magenta;
	}

	div.sbs{
		color: green;
		font-size: 20pt;
		width: 200px;
		height: 50px;
		border: 1px solid purple;
	}

	#kbs{
		position: absolute;
		top: 400px;
		left: 200px;
		width: 200px;
		height: 100px;
		font-size: 20px;
		padding-left: 20px;
		padding-top: 30px;
		border: 2px dotted gray;
	}

</style>

</head>
<body>

	<div style="color: red; font-size: 15pt; background: yellow; width: 200px; height: 150px;">안녕하세요</div>
	<div style="position:absolute; width: 200px; height: 150px; top: 200px; left: 300px; border: 3px dotted pink;">홍길동입니다</div>
	<div class="mbc">Hello</div>
	<div class="sbs">Happy Day</div>
	<div class="sbs">오늘은 즐거운 수요일</div>

	<font class="mbc">Have a Nice Day</font>
	<b class="mbc">Bold Test</b>
	<div id="kbs">쌍용교육센터</div>
</body>
</html>
★ div와 id
<!DOCTYPE html>
<html>
<head>
<meta charset="utf-8">
<title>Insert title here</title>
<style type="text/css">
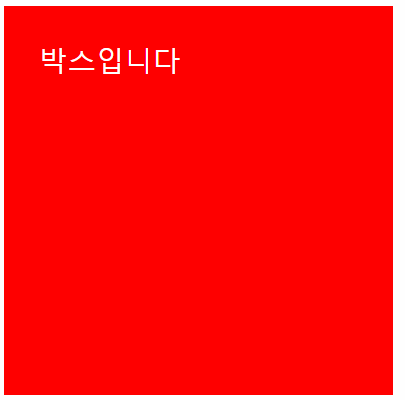
#box{
padding: 20px 0 0 20px; /* top부터 시계방향 안쪽여백 */
margin: 30px 0 0 40px; /* 패딩과 설정방향 같다..바깥쪽 여백 */
width: 200px;
height: 200px;
background-color: red;
color: #ffffff;
}
</style>
</head>
<body>
<div id="box">박스입니다</div>
</body>
</html>
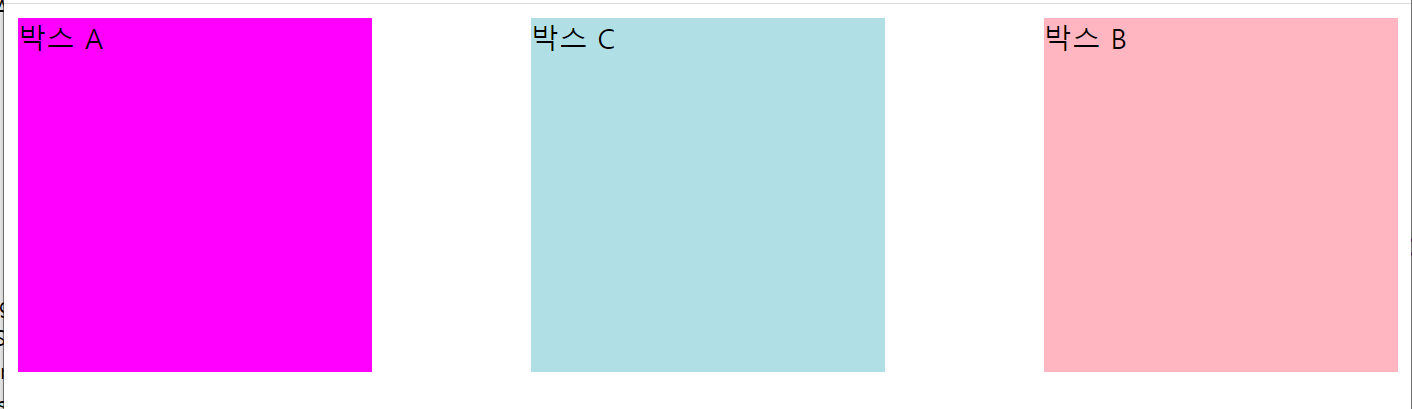
★ div float 나란히 늘어놓기
<!DOCTYPE html>
<html>
<head>
<meta charset="utf-8">
<title>Insert title here</title>

<style type="text/css">

	#boxa{
		/* float 속성에는 left, right, none이 있다 */
		/* 요소를 분리시킬 수 있는데, 중심으로 분리시킬땐 margin:auto */
		float: left;
		width: 200px;
		height: 200px;
		background-color: #ff00ff;
	}

	#boxb{
		float: right;
		width: 200px;
		height: 200px;
		background-color: #ffb6c1;
	}

	#boxc{
		margin: auto;
		width: 200px;
		height: 200px;
		background-color: #b0e0e6;
	}

</style>

</head>
<body>
	<div id="boxa">박스 A</div>
	<div id="boxb">박스 B</div>
	<div id="boxc">박스 C</div>
</body>
</html>
★ div CSS
◎ CSS
@charset "utf-8";

	#box{
		background-color: #fa8072;
		width: 800px;
		height: 500px;
		margin: auto;
		color: #ffffff;
	}

	#box h1{
		text-align: center;
		padding-top: 40px;
	}

	#box p{
		text-align: center;
	}

	#box ul li{
		padding-left: 100px;
		list-style: none;
	}
◎ HTML
<!DOCTYPE html>
<html>
<head>
<meta charset="utf-8">
<title>Insert title here</title>
<link href="../css/style2.css" rel="stylesheet">
</head>
<body>
<div id="box">
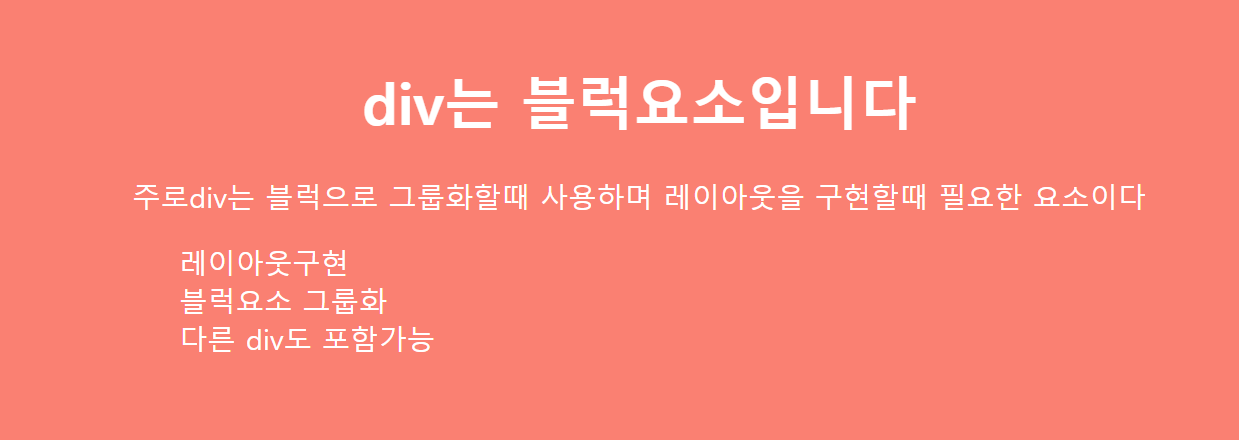
<h1>div는 블럭요소입니다</h1>
<p>주로 div는 블럭으로 그룹화할때 사용하며 레이아웃을 구현할때 필요한 요소이다</p>
<ul>
<li>레이아웃구현</li>
<li>블럭요소 그룹화</li>
<li>다른 div도 포함가능</li>
</ul>
</div>
</body>
</html>
★ CSS 자손
<!DOCTYPE html>
<html>
<head>
<meta charset="utf-8">
<title>Insert title here</title>
<style type="text/css">
/* tb1의 모든 구성요소에 적용 */
.tb1{
width: 500px;
border: 2px groove gray;
}
/* >: 바로 아래 태그를 의미 */
.tb1>thead>tr>th{
border: 1px solid gray;
background-color: #ffc0cb;
color: #ffffff;
}
.tb1>thead>tr{
height: 50px;
font-size: 1.2em;
}
.tb1>tbody>tr{
height: 30px;
text-align: center;
}
.tb1>tbody>tr>td{
color: white;
background-color: #db7093;
}
/* tb2 */
.tb2{
width: 400px;
border: 1px dotted gray;
border-collapse: collapse; /* 보더사이 간격 없애기 */
}
/* 띄어쓰기는 하위 전부 */
.tb2 th,tb2 td{
border: 1px dotted pink;
}
.tb2 thead tr{
height: 50px;
color: purple;
}
.tb2 img{
width: 100px;
}
/* td 태그의 1번 열의 너비조절 */
.tb2 td:nth-child(1) {
width: 70px;
}
/* td태그의 3번 열의 너비 글자색 우측 */
.tb2 td:nth-child(3) {
width: 100px;
color: blue;
text-align: right;
}
/* 테이블 이벤트 css에서 줄수도 있다 */
.tb1 tbody td:hover{
background-color: white;
color: black;
}
.tb2 tbody tr:hover{
background-color: yellow;
}
</style>
</head>
<body>
<table class="tb1">
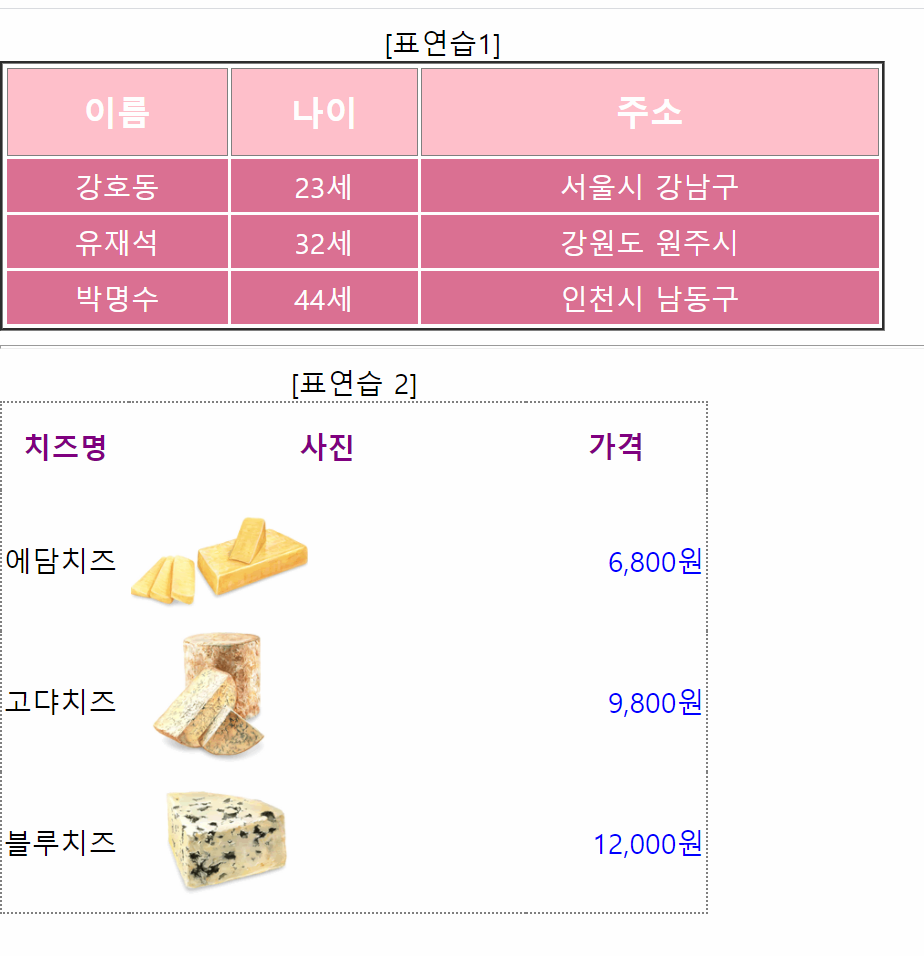
<caption>[표연습1]</caption>
<thead>
<tr>
<th>이름</th><th>나이</th><th>주소</th>
</tr>
</thead>
<tbody>
<tr>
<td>강호동</td><td>23세</td><td>서울시 강남구</td>
</tr>
<tr>
<td>유재석</td><td>32세</td><td>강원도 원주시</td>
</tr>
<tr>
<td>박명수</td><td>44세</td><td>인천시 남동구</td>
</tr>
</tbody>
</table>
<hr>
<table class="tb2">
<caption>[표연습2]</caption>
<thead>
<tr>
<th>치즈명</th><th>사진</th><th>가격</th>
</tr>
</thead>
<tbody>
<tr>
<td>에담치즈</td>
<td><img alt="에담치즈" src="../image/cheese1.png"></td>
<td>6,800원</td>
</tr>
<tr>
<td>고다치즈</td>
<td><img alt="고다치즈" src="../image/cheese2.png"></td>
<td>9,800원</td>
</tr>
<tr>
<td>블루치즈</td>
<td><img alt="블루치즈" src="../image/cheese3.png"></td>
<td>12,000원</td>
</tr>
</tbody>
</table>
</body>
</html>
Q. ★★★★★
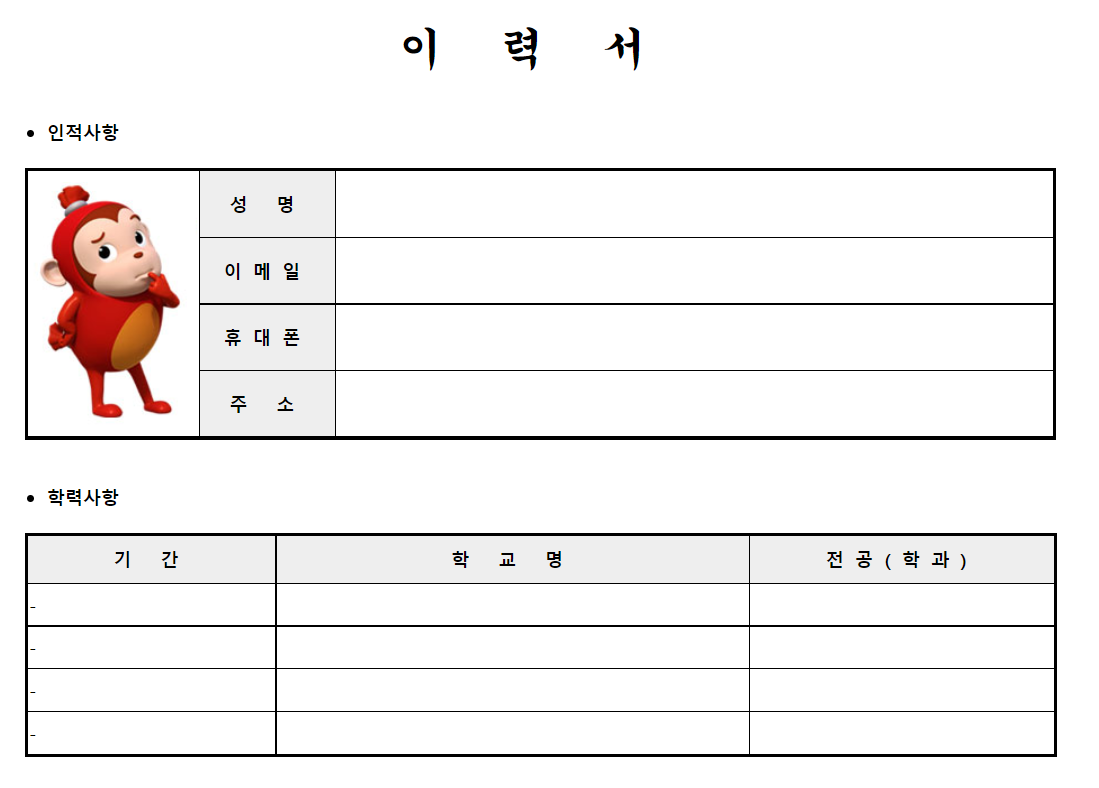
구글에서 이력서 검색해 양식 따라만들기
사진은 필수
<!DOCTYPE html>
<html>
<head>
<meta charset="utf-8">
<title>Insert title here</title>
<style type="text/css">
h1{
letter-spacing: 50px;
font-family: "궁서체";
font-size: 40px
}
table{
border: 3px solid black;
border-collapse: collapse;
margin-left: 20px;
}
th, td{
border: 1px solid black;
border-collapse: collapse;
}
table th{
background-color: #eeeeee;
padding: 10px 10px 10px 10px;
letter-spacing: 10px;
}
table td{
height: 35px;
}
.tb1 th{
width: 100px;
}
.tb4 th{
letter-spacing: 0;
width: 82px;
}
.tb4 td{
padding-left: 160px;
width: 140px;
}
ul, li{
margin-top: 40px;
}
</style>
</head>
<body>
<h1 align="center">이력서</h1>
<ul>
<li><h4>인적사항</h4></li>
</ul>
<table class="tb1">
<tr>
<td rowspan="4"><img alt="이력서" src="../image/image_01.png" style="max-width: 100%"></td>
<th>성 명</th>
<td width="635px"></td>
</tr>
<tr>
<th>이메일</th>
<td colspan="10"></td>
</tr>
<tr>
<th>휴대폰</th>
<td colspan="10"></td>
</tr>
<tr>
<th>주 소</th>
<td colspan="10"></td>
</tr>
</table>
<ul>
<li><h4>학력사항</h4></li>
</ul>
<table class="tb2">
<tr>
<th width="200px">기 간</th>
<th width="400px">학 교 명</th>
<th width="250px">전공(학과)</th>
</tr>
<tr>
<td>-</td>
<td></td>
<td></td>
</tr>
<tr>
<td>-</td>
<td></td>
<td></td>
</tr>
<tr>
<td>-</td>
<td></td>
<td></td>
</tr>
<tr>
<td>-</td>
<td></td>
<td></td>
</tr>
</table>
<ul>
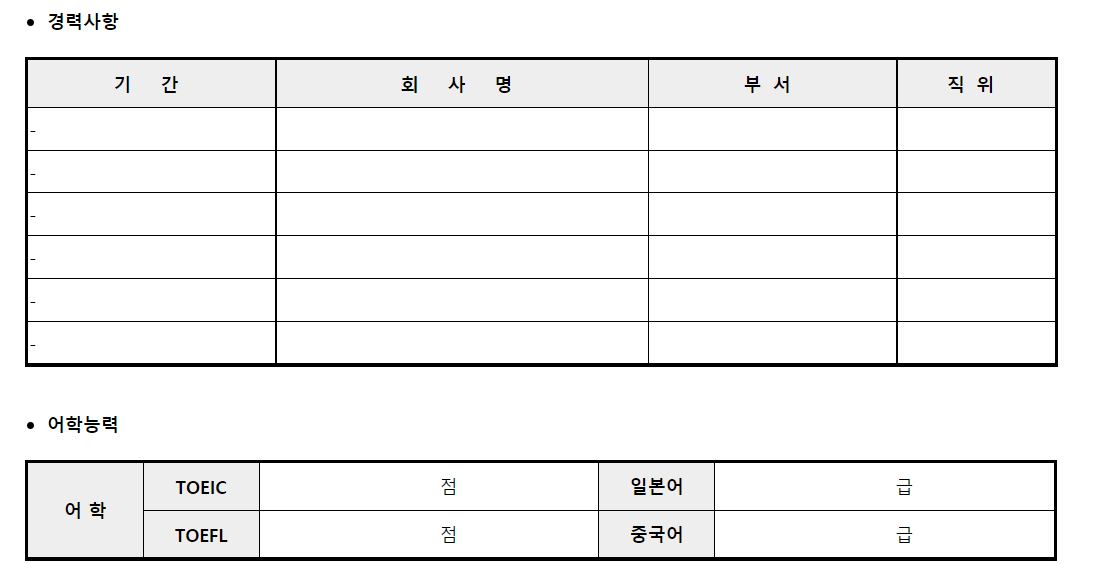
<li><h4>경력사항</h4></li>
</ul>
<table class="tb3">
<tr>
<th width="200px">기 간</th>
<th width="310px">회 사 명</th>
<th width="200px">부서</th>
<th width="120px">직위</th>
</tr>
<tr>
<td>-</td>
<td></td>
<td></td>
<td></td>
</tr>
<tr>
<td>-</td>
<td></td>
<td></td>
<td></td>
</tr>
<tr>
<td>-</td>
<td></td>
<td></td>
<td></td>
</tr>
<tr>
<td>-</td>
<td></td>
<td></td>
<td></td>
</tr>
<tr>
<td>-</td>
<td></td>
<td></td>
<td></td>
</tr>
<tr>
<td>-</td>
<td></td>
<td></td>
<td></td>
</tr>
</table>
<ul>
<li><h4>어학능력</h4></li>
</ul>
<table class="tb4">
<tr>
<th rowspan="2">어 학</th>
<th>TOEIC</th>
<td>점</td>
<th>일본어</th>
<td>급</td>
</tr>
<tr>
<th>TOEFL</th>
<td>점</td>
<th>중국어</th>
<td>급</td>
</tr>
</table>
</body>
</html>
◎ 글자 사이 간격
https://www.codingfactory.net/10463
CSS / letter-spacing, word-spacing / 글자 사이 간격, 단어 사이 간격
letter-spacing, word-spacing 글자 사이의 간격은 letter-spacing으로, 단어 사이의 간격은 word-spacing으로 정합니다. 값이 커지면 간격이 커집니다. 값에는 음수를 넣을 수 있습니다. 음수를 값으로 하는 경
www.codingfactory.net
◎ 이미지 크기 맞춰넣기
[HTML] 테이블 td 안에 이미지를 딱 맞춰서 넣자
다음 코드에서 글 내용 부분에 이미지를 넣으려고한다. <이미지 맞춤 전체 코드> 글번호 ${fun.num} 조회수 ${fun.readcount} 작성자 ${fun.writer} 작성일 ${fun.reg_date} 글제목 ${fun.subject} 글내용 ${fun.c..
namubada.net
댓글